 |
What is Zoom?
Zoom is a video / audio conferencing tool that works with your computer, phone, and / or conference room system (Polycom). It can work as an online conference room, phone bridge, or webinar host. It works with Windows, Mac, mobile (Android / iOS), regular phone lines, and in-room cameras (H.323). It’s flexible, reliable, and easy to use so it is replacing systems like AT&T conference phone lines. It’s similar to things you might have used before like GoToMeeting, WebEx, or Skype.
QUICK: How do I get Zoom RIGHT NOW
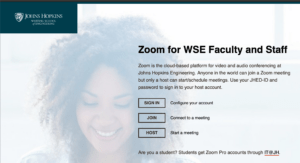
- READ CAREFULLY — PEOPLE OFTEN GET THIS WRONG WHICH CAUSES DELAY IN GETTING AN ACCOUNT. Faculty and staff should go to WSE.zoom.us and log in to create an account. That address is WSE.zoom.us, not www.zoom.us or jh.zoom.us. If you go to a different URL, we in WSE IT can’t approve your account. The login page YOU MUST GO TO for the full account looks like this:

- JH students should go to https://jhubluejays.zoom.us. They get the same features as the faculty/staff accounts. Here’s a handout about student accounts.
- WSE users are automatically given a paid, Licensed Pro account which is good for meetings of up to 300 attendees of 24-hour duration. If you have mixed affiliation and the login doesn’t work as expected, please make a ticket with us to take a look.
The “Fine Print” About Zoom
JH has signed an agreement with Zoom to give us the tools for a reduced cost. “Reduced cost” isn’t free, so while we want to make it as easy as possible for people to get comfortable with the tool and want people who need Zoom to use it, it wouldn’t be prudent to automatically give everyone a paid account forever. Here’s how it works.
- Paid accounts can have meetings up to 24 hours long with 300 participants. The school is paying the bill.
- If you already have a Zoom account (personal or other) but want a WSE account, you need to 1) log out of Zoom in whatever other account you have, and 2) go to WSE.zoom.us and make a new account. We can’t “see” accounts made in other instances, so we can’t upgrade them to Licensed Pro features.
- Periodically (a few times a year) we’ll look for paid accounts that aren’t getting used and will downgrade them back to free accounts. They’re eligible to get re-elevated to paid, of course, but we want to have some cost control for people who think they’ll use Zoom but then really don’t need it. All it should take to re-elevate an account to Licensed Pro is to log in again to the Zoom website, but if you have a question send us an email.
- Participants in meetings don’t need accounts — the level of meeting (free vs. paid) is determined by the person who schedules the meeting.
- Paid accounts can schedule as many meetings as they want, but can have only one meeting active at any one time. While it is tempting to share accounts this can be challenging to schedule, in case two meetings need to overlap
- There are add-ons available for things like using Polycom cameras (aka “H.323 or SIP endpoints”), large webinars (hundreds through thousands of people — see a comparison of webinars vs meetings here), and “Zoom Rooms” (tablet software that makes using Zoom in a physical conference room easier). People should ask us at wsehelp@jhu.edu if they need any of these features.
- If you ended up here by accident and really need help using Zoom in a conference room with a Polycom device, we have info about that here.
Avoid getting Zoom-bombed
You may have seen Zoom-bombing in the news. It’s when people find or guess your Zoom meeting information and then present inappropriate content. It used to be that you had to take some configuration steps to avoid being open to “bombing,” but starting September 27 Zoom will be forcing these changes.
All meetings must have either a passcode or a waiting room. A waiting room will be added to any meeting that doesn’t have a passcode. The waiting room will let you decide if and when to admit people to meetings that might have been scheduled in the past without a password.
A few simple configuration choices can help reduce the chance your meeting gets bombed.
- Consider a webinar instead of a meeting. Webinars limit the participation options by people who join your meeting, reducing the ability to be bombed.
- Email Zoom session URLs to students or post on a password protected site like Blackboard. Don’t post them publicly if they include the meeting passcode in the link. URLs with the passcode embedded end in ?pwd=lotsofgibberishhereattheend.
- Enable passwords on all Zoom meetings. Consider using the waiting room so you can admit individual attendees.
- Disable participants’ ability to share their screen when they enter. The host can enable participants to share their screen individually once the meeting begins.
Steps:
Before Your Meeting
Add a Password to your Zoom session
-
- Login to your Zoom Account in a browser.
- Click on Settings on the side menu.
- Enable the following two settings for your Zoom account. Changing these settings will affect the default setup of all meetings you schedule in the future.
-
-
- “Require a password when scheduling new meetings”
- “Embed password in meeting link for one-click join” – Doing this prior to scheduling a meeting will allow you to continue sharing one url link with students, rather than requiring them to know and input an additional password.
-
-
- Schedule a new meeting with a password and email students the new secure link associated with it.
- Edit the settings for your already-scheduled meeting to include “Require meeting password” and share that password with students. This can be done by 1) Clicking on the “Meetings” option in your Zoom account. 2) Clicking the title of your meeting. 3) Click the “Edit this Meeting” button. 4) Check the “Require meeting password” option. Students will need both the link and password to join the meeting.
- Use the waiting room to admit people individually as they join
-
- Login to your Zoom Account in a browser.
- Click on Settings on the side menu
- Under the “Screen sharing” option, allow “Host Only” to share their screen. You can change this option during the meeting to allow students to share their screen.
Teaching with Zoom: Best Practices
Following a few best practices can make things go much more smoothly when you’re teaching with Zoom. The wizards on EP’s instructional technology team have come up with a page with several suggestions. It can be found here.
It includes tips like
- Provide both a Zoom meeting link and dial-in options for your course.
- Provide students with any learning materials (e.g., slides, documents, data) needed for your class session before the class starts.
- Record your class session in Zoom.
- Provide students with the Zoom recording and class materials after your class session ends.
- Avoiding Zoom bombing
Please go get full instructions on their site.