Important Notes:
- You MUST be attached directly to a Johns Hopkins network (wired, wireless, or VPN) to be able to reach the license server.
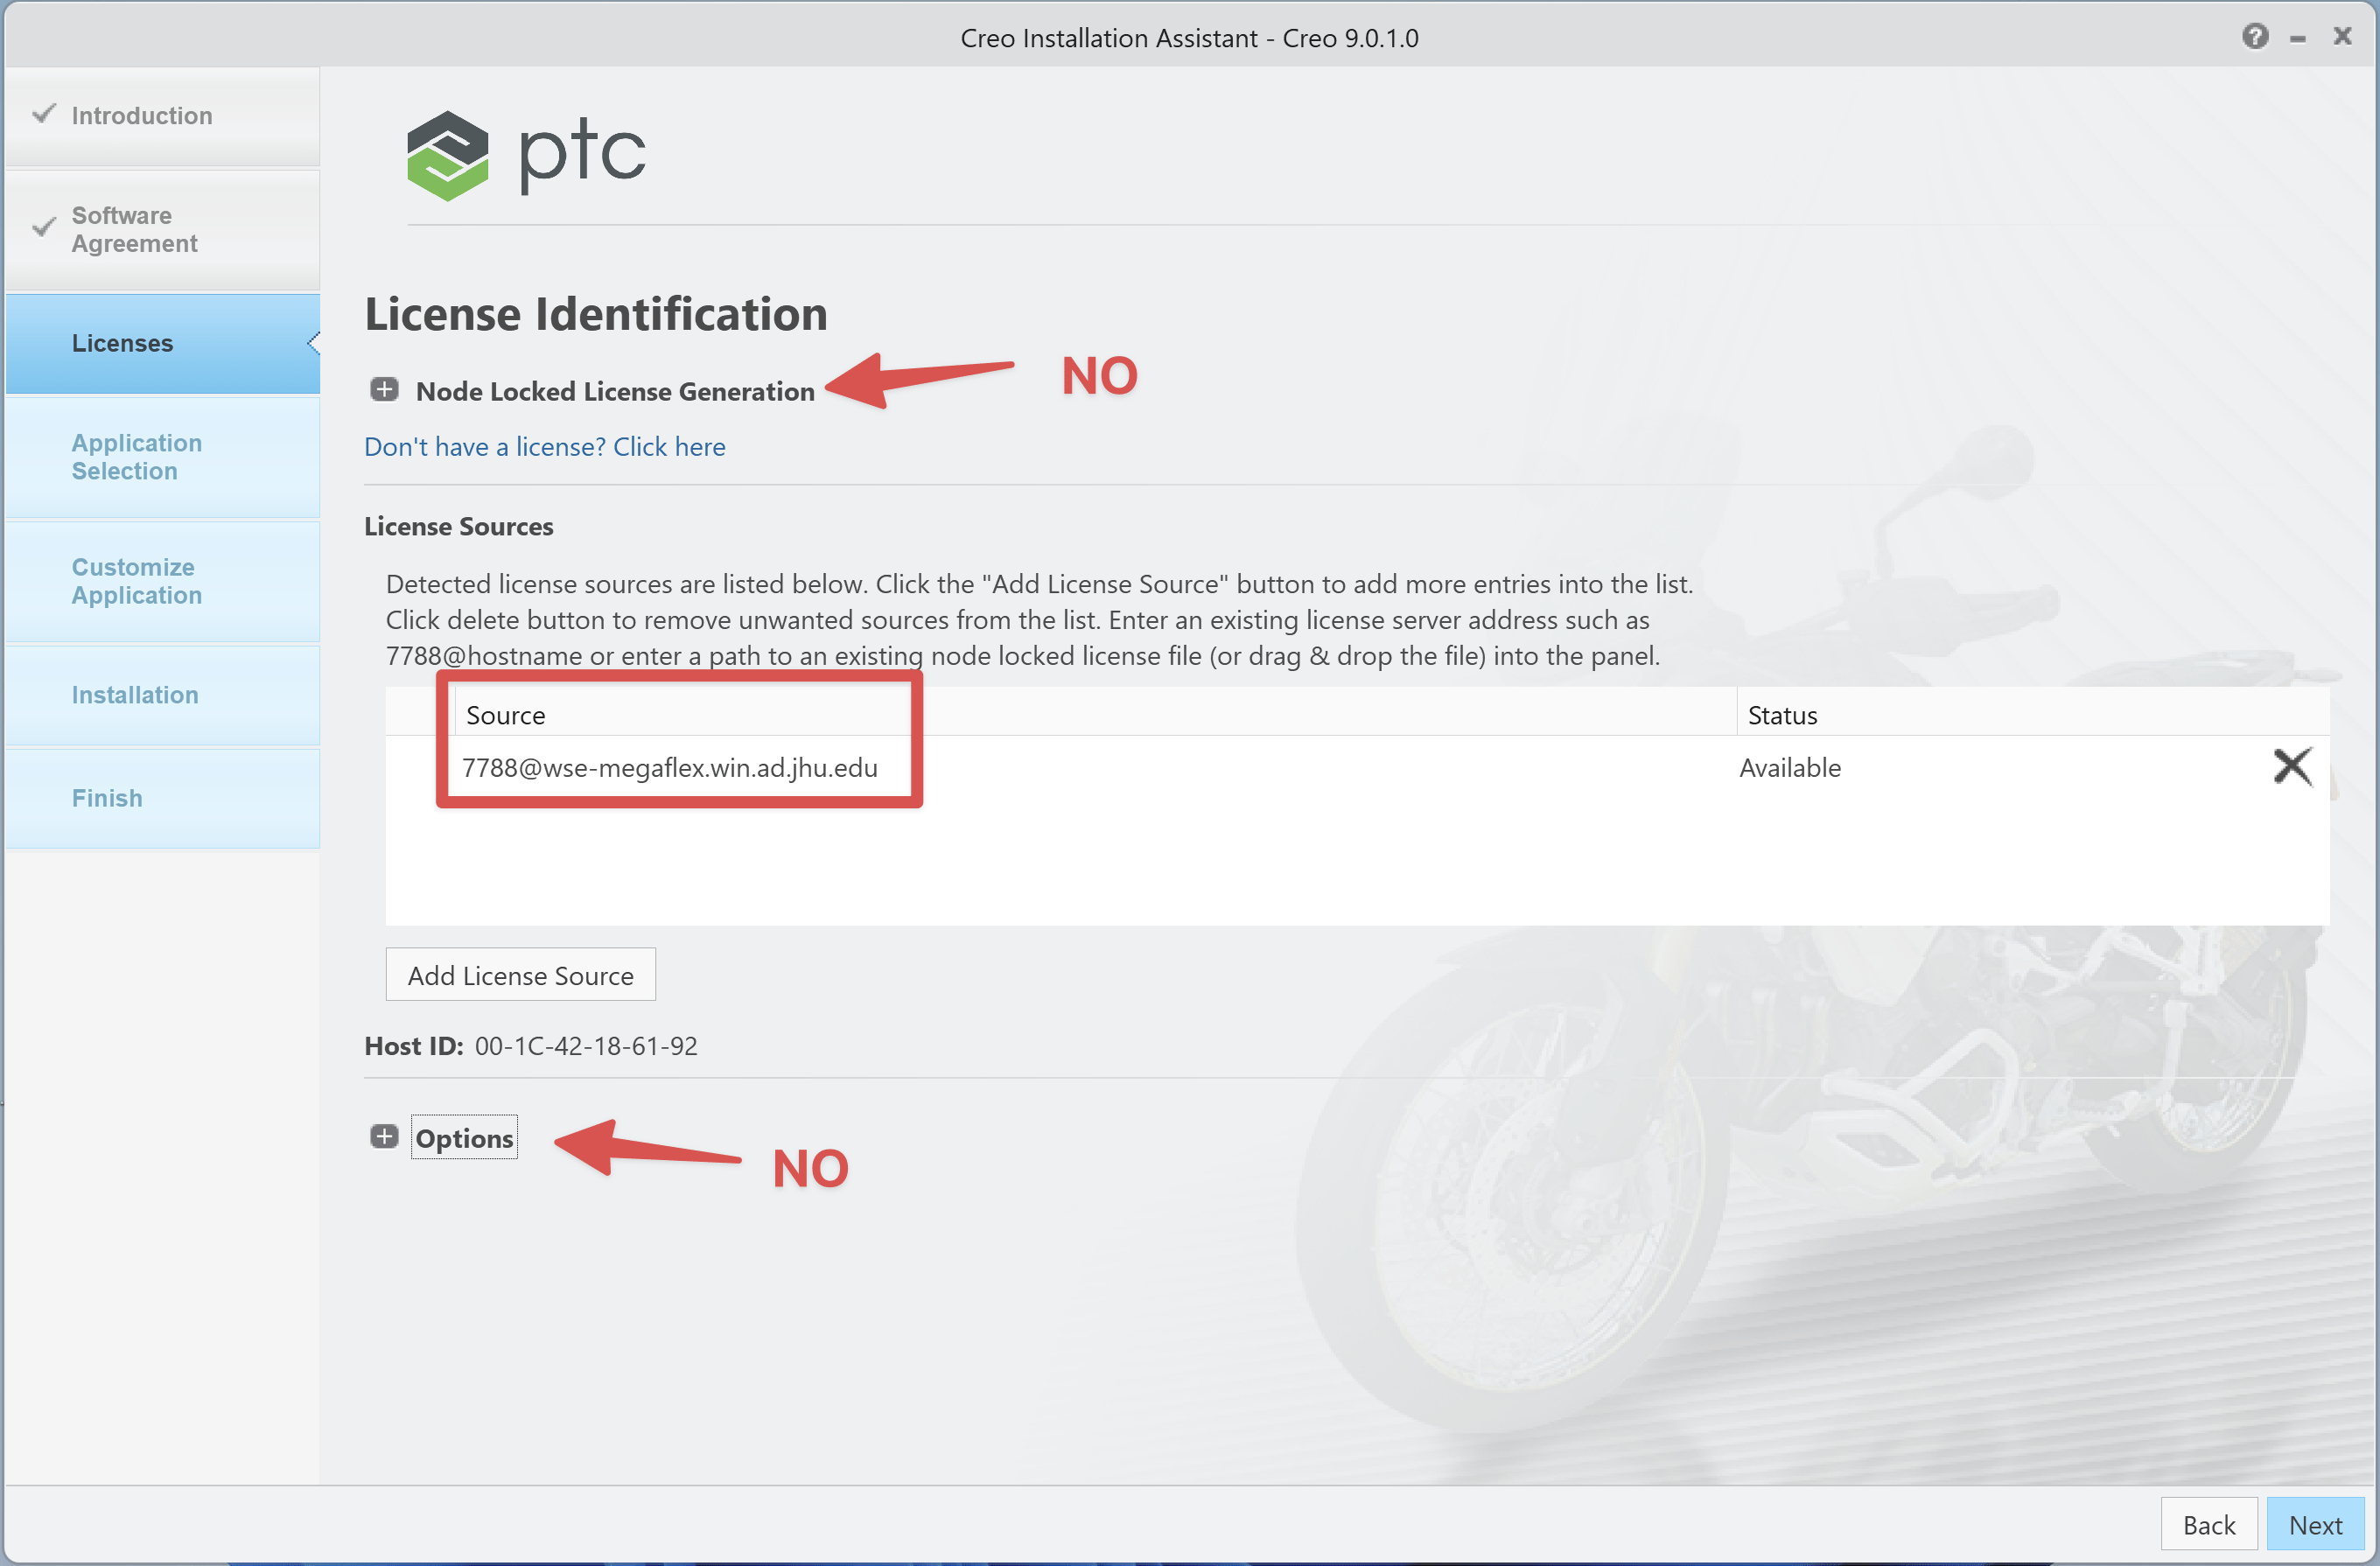
- Some have had trouble identifying where to type in the license server information for CREO. There’s a screenshot below. That license server is 7788@wse-megaflex.win.ad.jhu.edu.
- For a few residential but Hopkins-networked locations you might not be able to connect to the license server even when connected to the JHU network. It’s their network — we can’t fix it! You can work around this problem by using 7788@10.173.38.156 as the license server string.
ARM Mac Users or ARM Windows users (like with Qualcomm Snapdragon Windows hardware):
If you have an ARM Mac (like an M-series Macbook) or an ARM-based Windows machine (Qualcomm Snapdragon processor, sometimes called Copilot+ PCs), and want to try to install Creo there are some extra steps that need to be followed. NOTE that this isn’t a great solution for serious work, but many have found it good enough for completing homework assignments. Serious CAD users should use real x64 Windows on real Intel Windows hardware with GPU support.
- Mac users only for this first step: Create your Windows virtual machine. Windows 11 on ARM is required. Refer to the documentation for Parallels or VMWare to see how to do this.
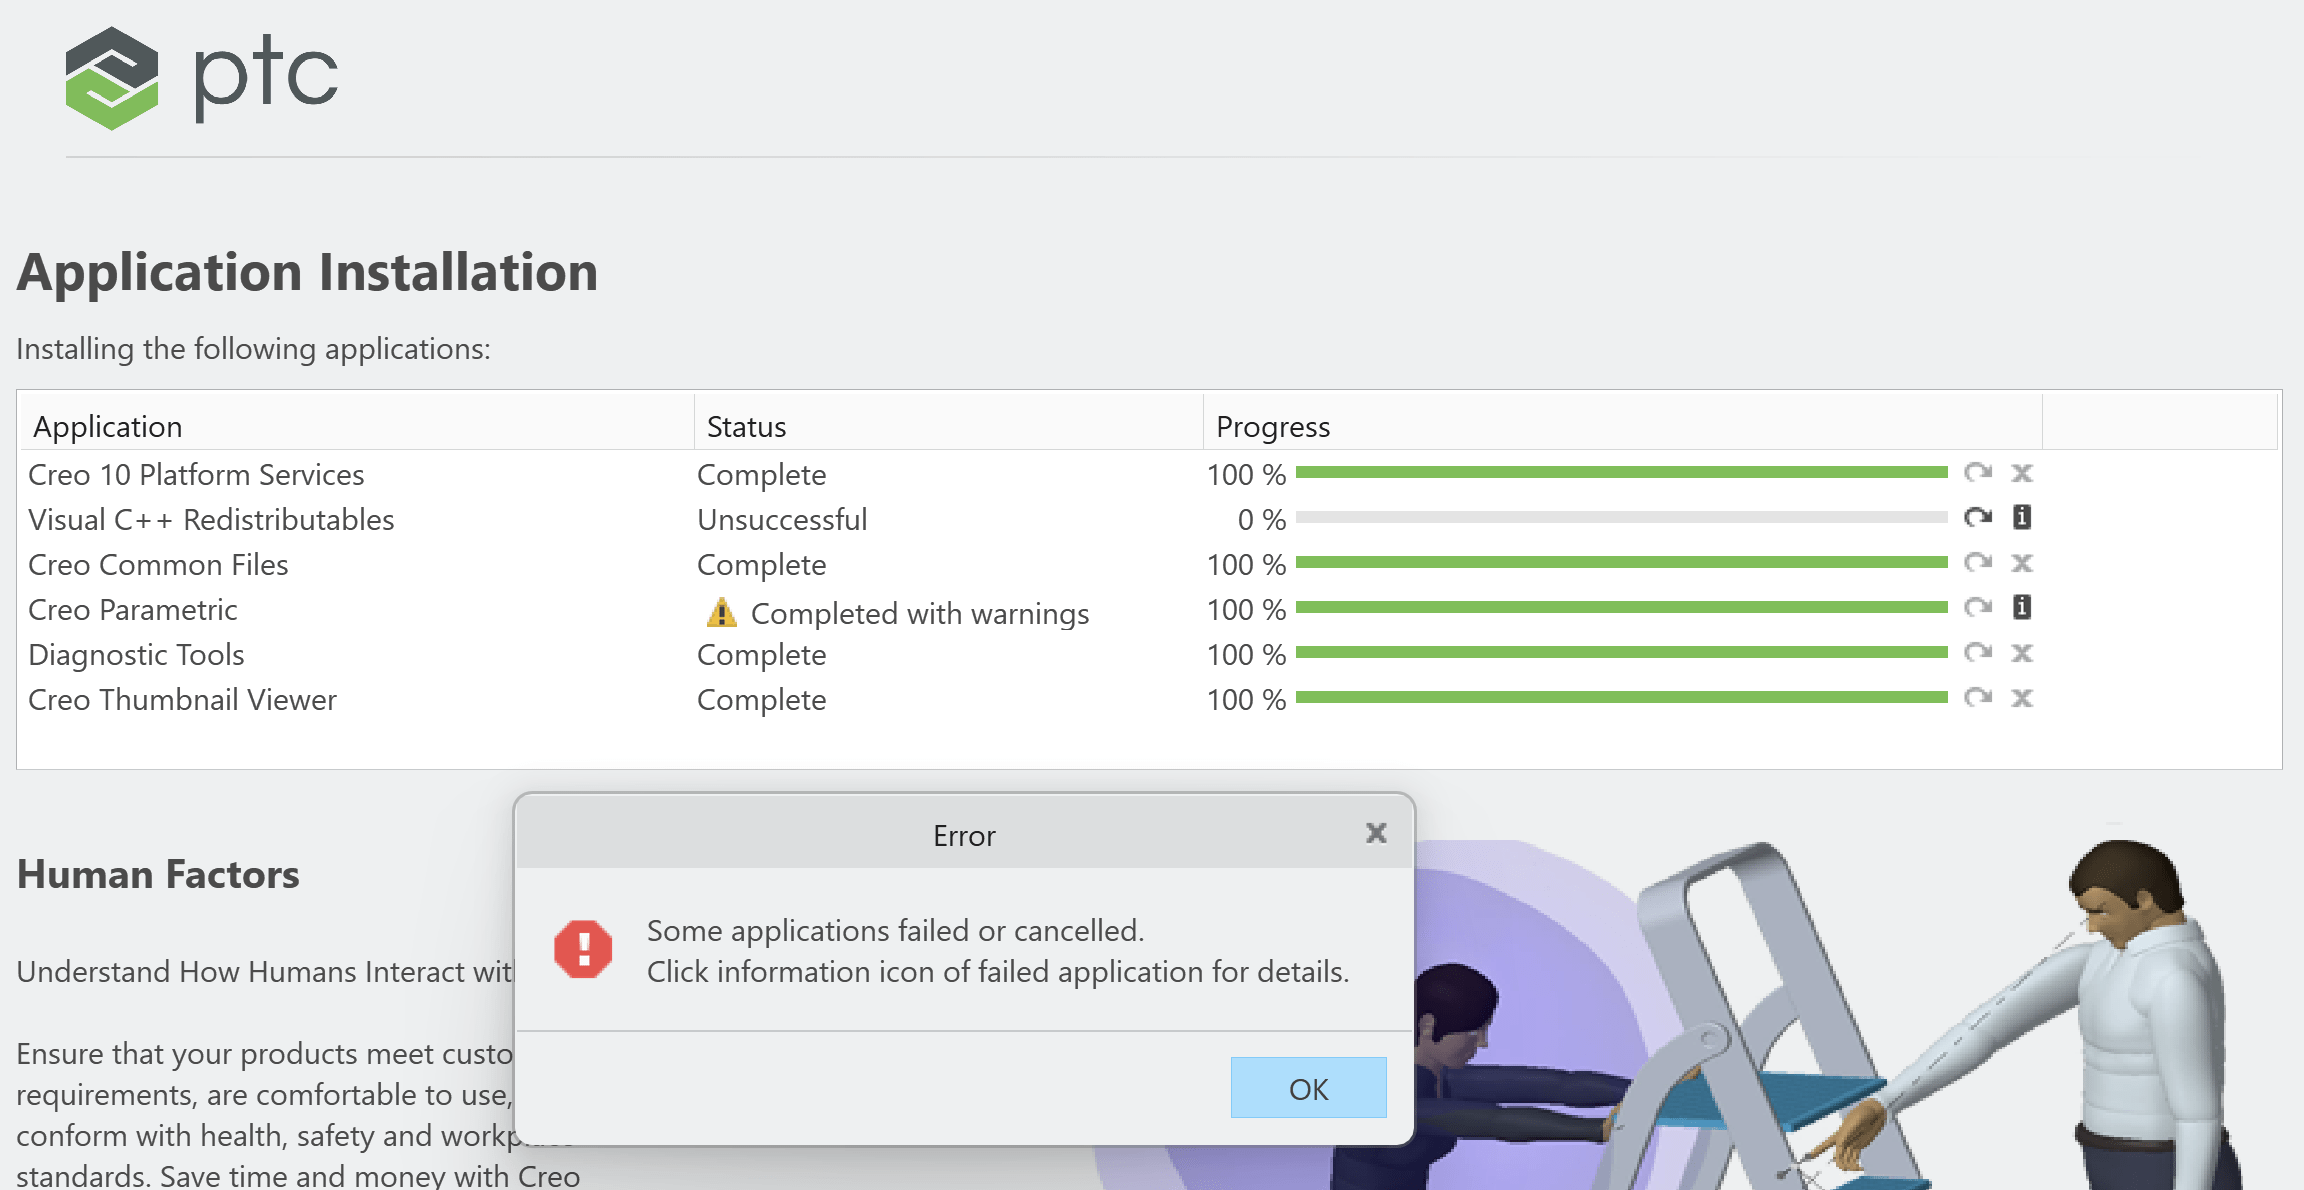
- Download and run the installer in the new virtual machine. You will probably get this error at the end of installation about the Visual C++ Redistributables, but it can safely be ignored.
- Before launching Creo, you must edit a file AS WINDOWS ADMINISTRATOR. If you do not do this AS ADMINISTRATOR you won’t be able to save the edited file and the application won’t launch.
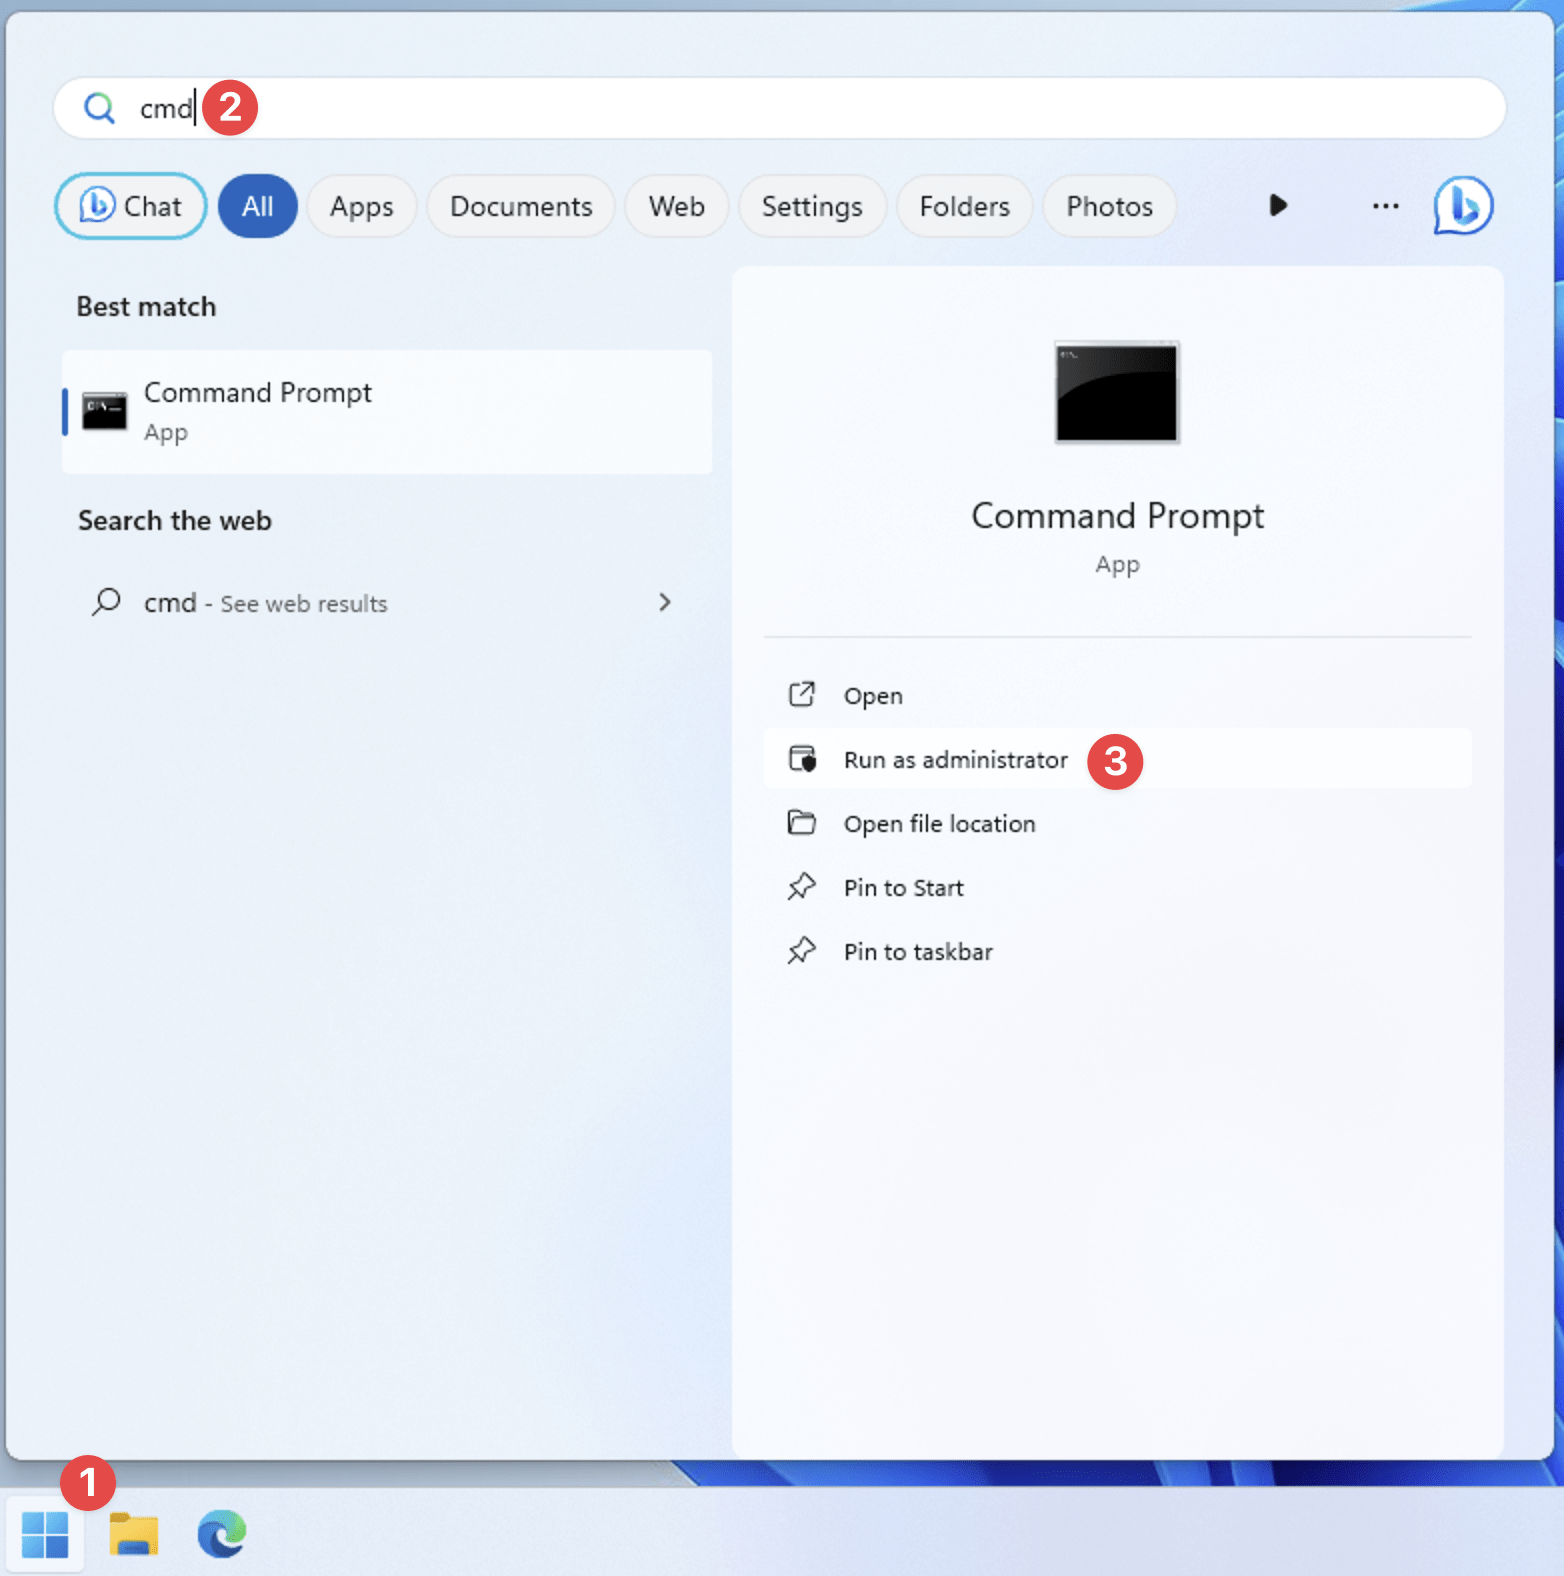
- Hit the Start button, type CMD, and then select Run as administrator
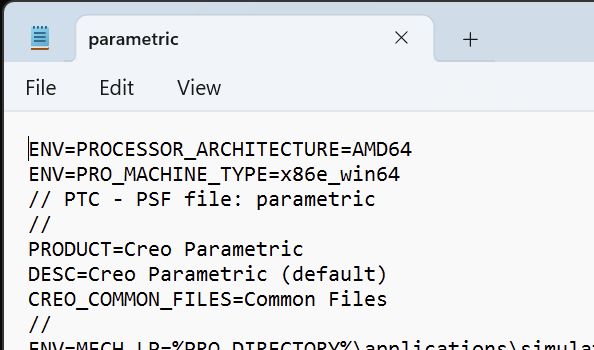
- In the resulting Administrator Command prompt, type (for version 12.4.0.0–you might need to adjust based on your installed version)
notepad “c:\Program Files\PTC\Creo 12.4.0.0\Parametric\bin\parametric.psf” - At the top of the Notepad file, add the lines
ENV=PROCESSOR_ARCHITECTURE=AMD64
ENV=PRO_MACHINE_TYPE=x86e_win64
and save the file.
- You can now launch Creo on ARM Windows