OneDrive has sync tools available for Mac and Windows, plus clients with offline capabilities for iOS and Android mobile platforms. The OneDrive sync tool is usually installed with Microsoft Office, but if you don’t have it already installed on your device you can get it from Microsoft.
By default, OneDrive’s sync tools sync your personal content only. If you wish to also sync content shared to you from OneDrive, Sharepoint, or Teams you can do that as well, but you’ll need to tell the client you wish those files to be sync’ed to your computer. Here is a series of screenshots from Windows detailing the process, but it works the same on the Mac.
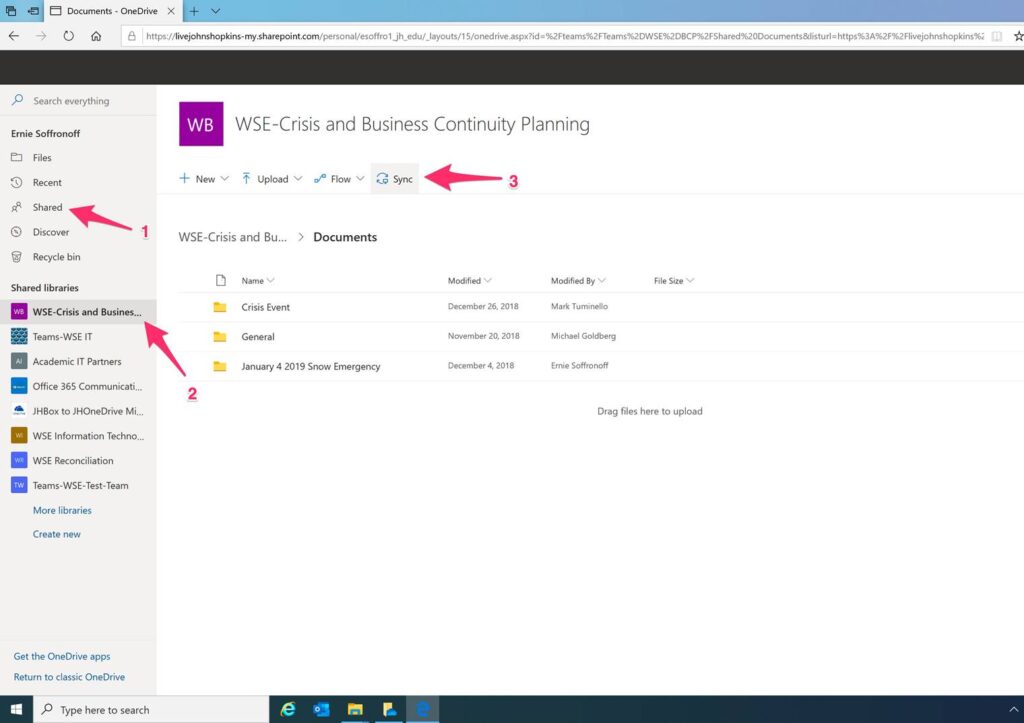
First, go to the OneDrive site on the web. You can get there through MyJH -> Cloud -> OneDrive, or directly at onedrive.jh.edu. On the OneDrive page, you will click on Shared, then the name of the shared folder you wish to sync, and then hit the Sync button. If you don’t see what you’re looking for under Shared Libraries, which shows your most recent / most popular libraries, click the More Libraries link to see ALL the items shared with you.
(In this example, we want to sync the Crisis and Business Continuity Planning shared folder.)
You will be asked to confirm that you want to sync this directory, and then the website will connect to the client on your computer to start the sync process. It takes a few seconds to get this started.
You can confirm it worked by checking in the OneDrive app on your computer. You should now see your new location syncing.
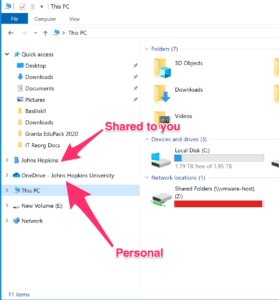
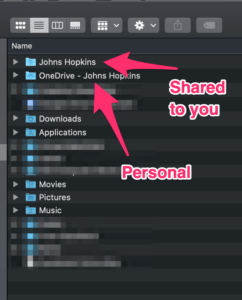
“Personal” in the screenshot below is the files owned by you, and will be in a folder called “OneDrive – Johns Hopkins.” The “Johns Hopkins” folder is more like a departmental share from a fileserver and will have files you sync that are shared to you from another user.
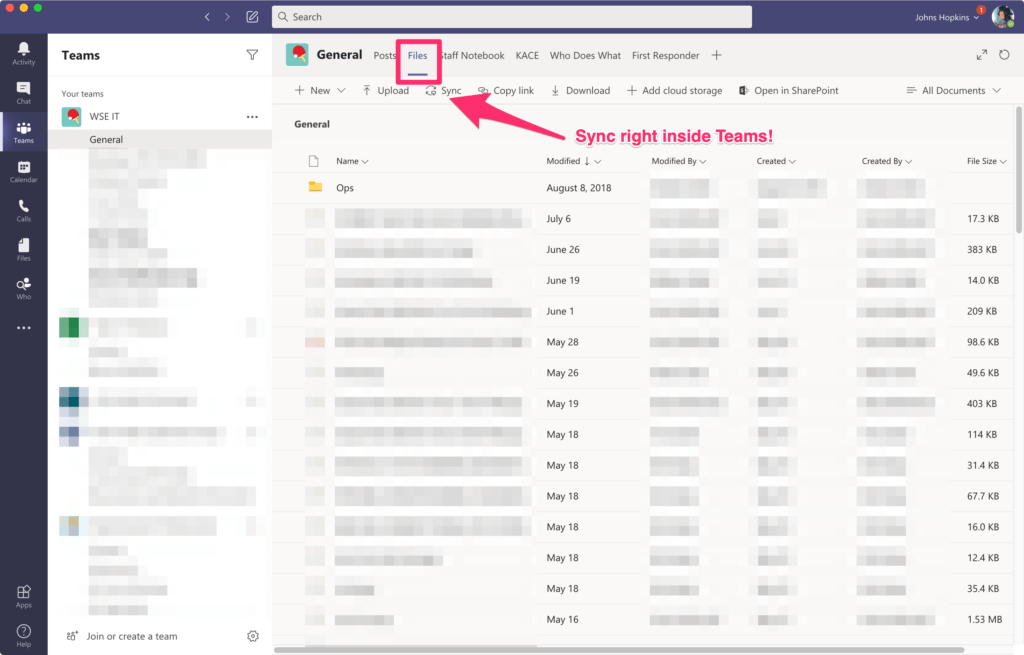
You can also start the sync of shared files directly inside the Teams client. It will sync using the OneDrive client as in the example above.
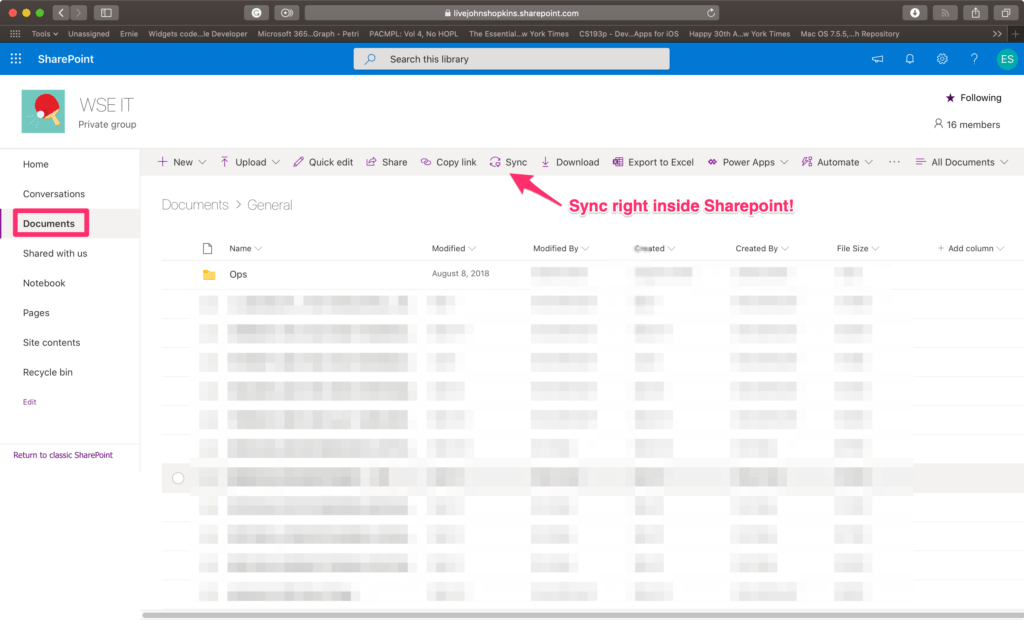
Or you can sync inside a Sharepoint site. This is the Sharepoint version of the Teams site above. Teams sites are a type of pre-configured Sharepoint site, but the files are all OneDrive!
Other Notes about Sync:
- Syncing is usually the fastest and most reliable way to upload a lot of files to the cloud. It can still take a lot of time if you do a lot of files, but because it is able to reliably restart (if you close the lid on your laptop, or your computer crashes) you know that you will end up with everything you expect.
- JH’s OneDrive can store 5TB per user, which is much larger than most computers, phones, or tablets can store. You can still sync, though. There are two main tools available to control how much space you use on your machine.
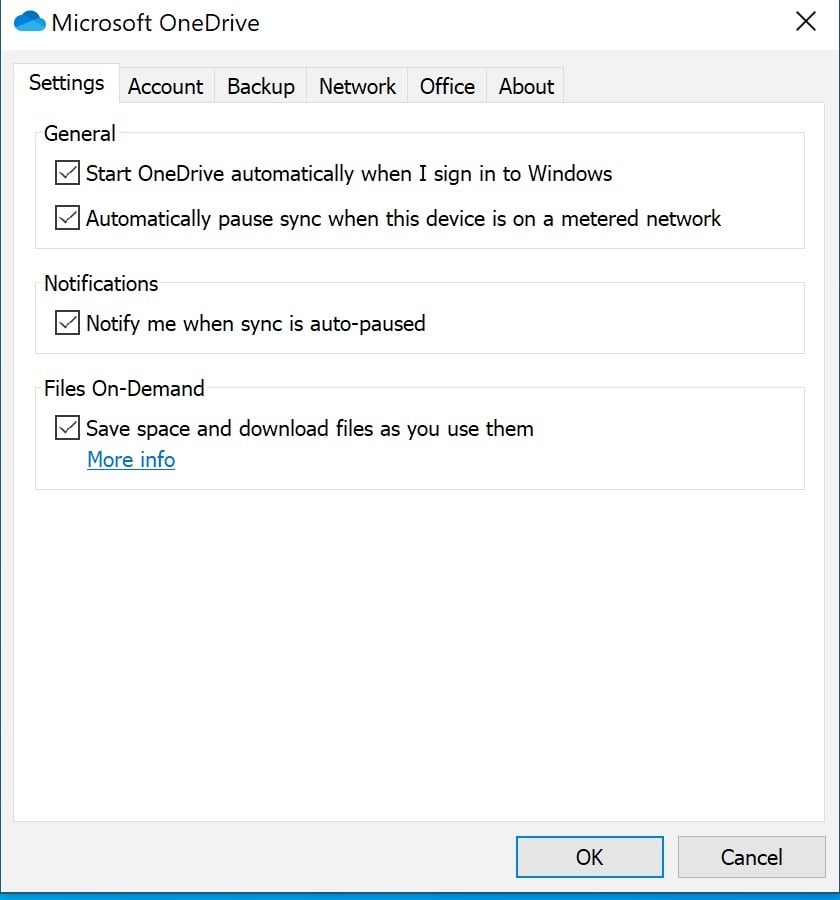
- First, there is a feature that will sync all the file names down to your computer (so you can browse for or search for files by name) but doesn’t sync the contents until you actually need the file. If you go to open one of these file stubs, Files On-Demand will go fetch the contents from the cloud and keep them in sync. More details are available on Microsoft’s website.
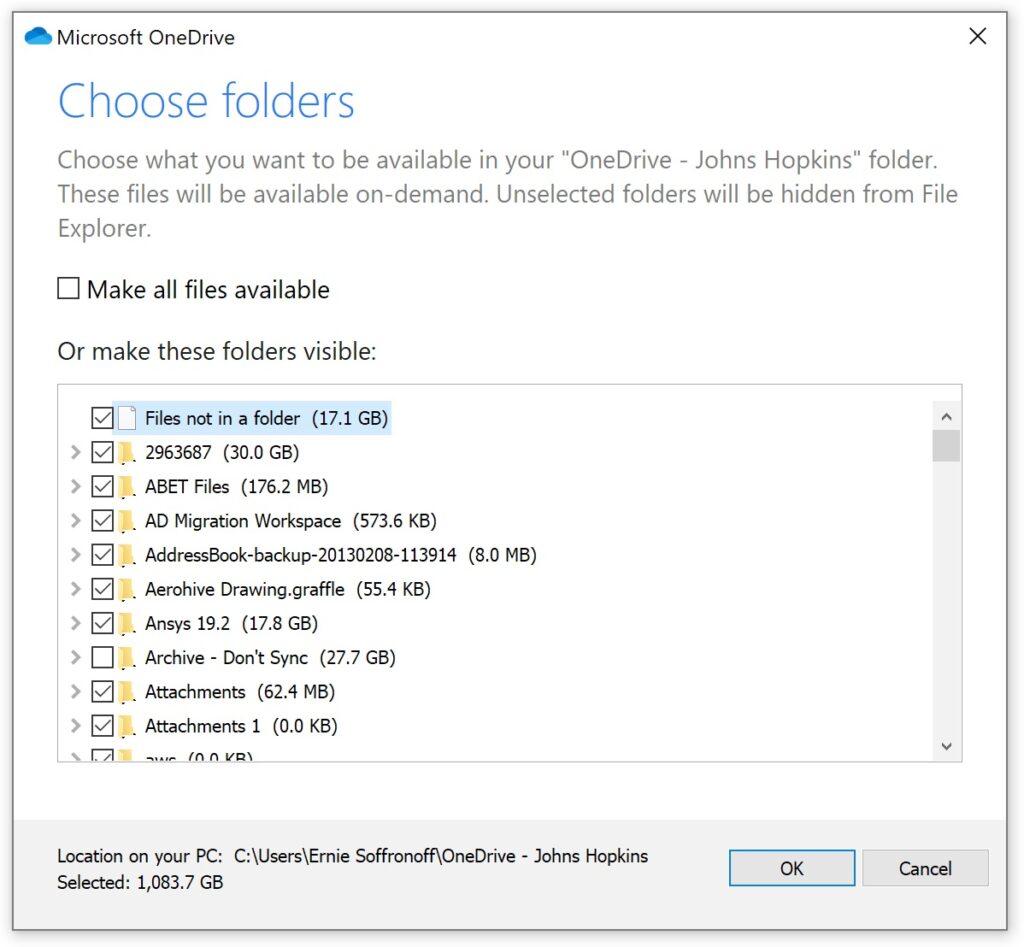
- Second, you can elect to completely exclude a folder from sync if you are sure you don’t ever need copied to your computer. In this example I have an old archive that I want to keep but don’t ever care about syncing down to my computers. I unchecked the box next to the folder.
- First, there is a feature that will sync all the file names down to your computer (so you can browse for or search for files by name) but doesn’t sync the contents until you actually need the file. If you go to open one of these file stubs, Files On-Demand will go fetch the contents from the cloud and keep them in sync. More details are available on Microsoft’s website.
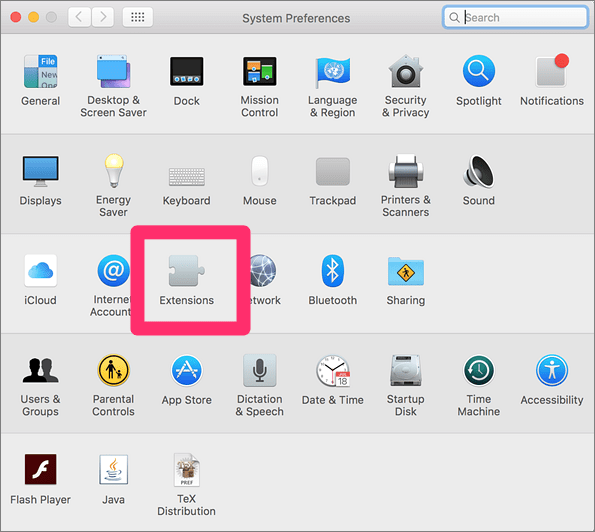
- On the Mac, make sure you have Finder Integration enabled. For Finder integration see System Preferences -> Extensions, then make sure OneDrive is enabled in the Finder.

