Provisioning an Azure subscription
An Azure subscription is the basic container for all your Azure resources and is linked to a specific budget number for billing. Within that subscription, a resource group is created, and resources including OpenAI resources (instances) can be created within it. If you have more than one budget number that you want to charge, multiple subscriptions will need to be created.
To provision a new subscription, WSE affiliates1 should e-mail wsehelp@jhu.edu with a budget number and budget alert thresholds, and a name (ex. wse-labname, etc.) There are no hard budget limits in Azure by design, only alerts. A monthly budget for the entire subscription will be set and two alerts for some percentage of the budget being used per month. For instance, you could set a budget of $500 a month and then set alerts for 50% and 90% of that budget amount used in that month.
Once the subscription has been provisioned, the PI or requester will have access to the Azure portal and all Azure products. If the end users only require API keys, those can be shared with them. If they need access to either the whole Azure subscription and all its products OR only access to Azure AI Studio, please let us know their JHED IDs.
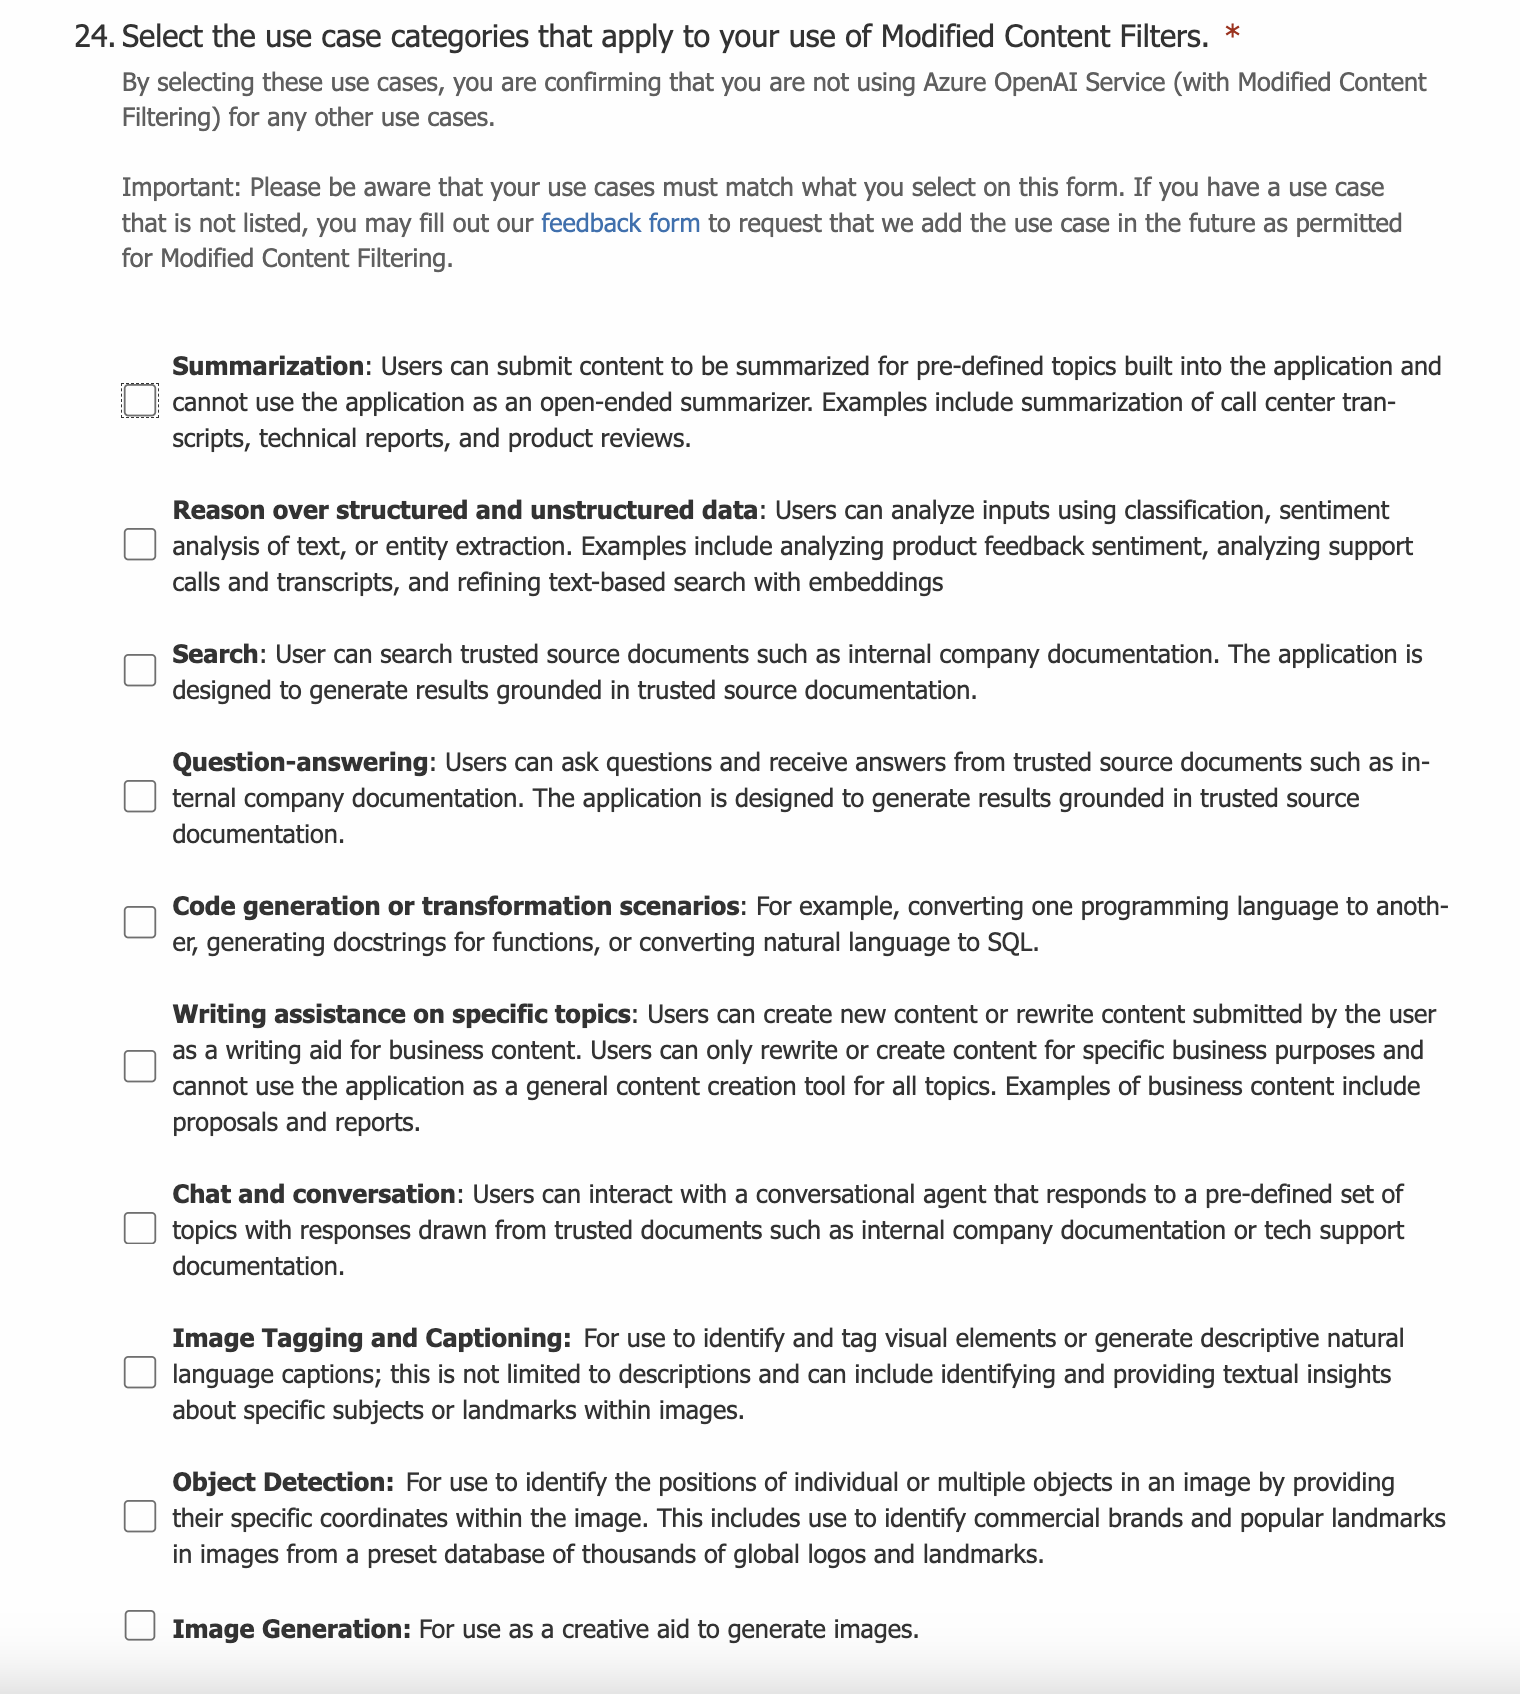
Requesting OpenAI access
Getting access to OpenAI requires an additional step. You will need to indicate your use cases. You can see the list of use cases below or via question 24 on this form. Do not submit the form. Instead, you can screenshot the form with your marks and send the screenshots to wsehelp@jhu.edu.
Create OpenAI resources
Each OpenAI resource has a unique set of API keys. An OpenAI resource should be created for each set of unique API keys desired. You can view the cost of each individual OpenAI resource but not of individual deployments within an OpenAI resource.
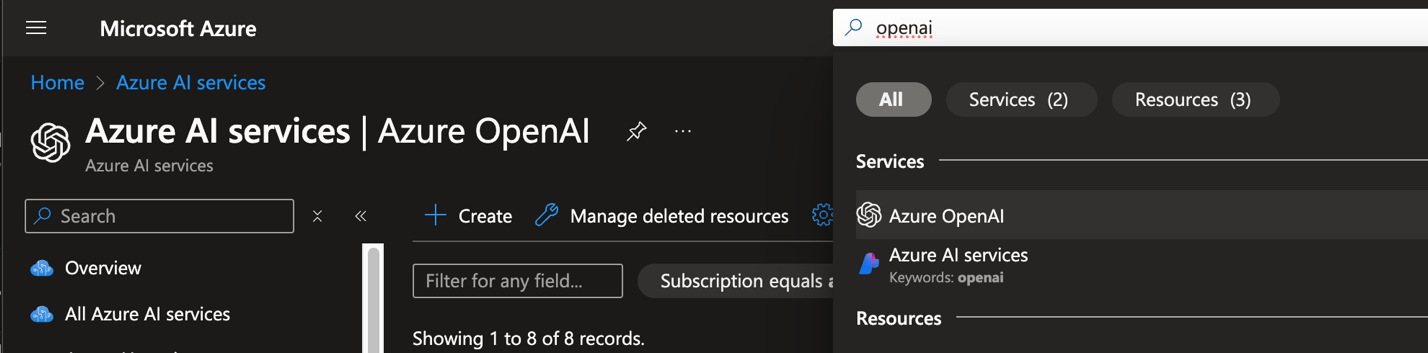
To create an OpenAI resource, you can search for OpenAI in the search bar in the dashboard, and select it under ‘services.’ Then you can click on create, pick a resource group or create a new one, East US region, a name, and the default pricing tier. For networking select ‘All Networks.’ Click ‘next’ and then ‘Create.’
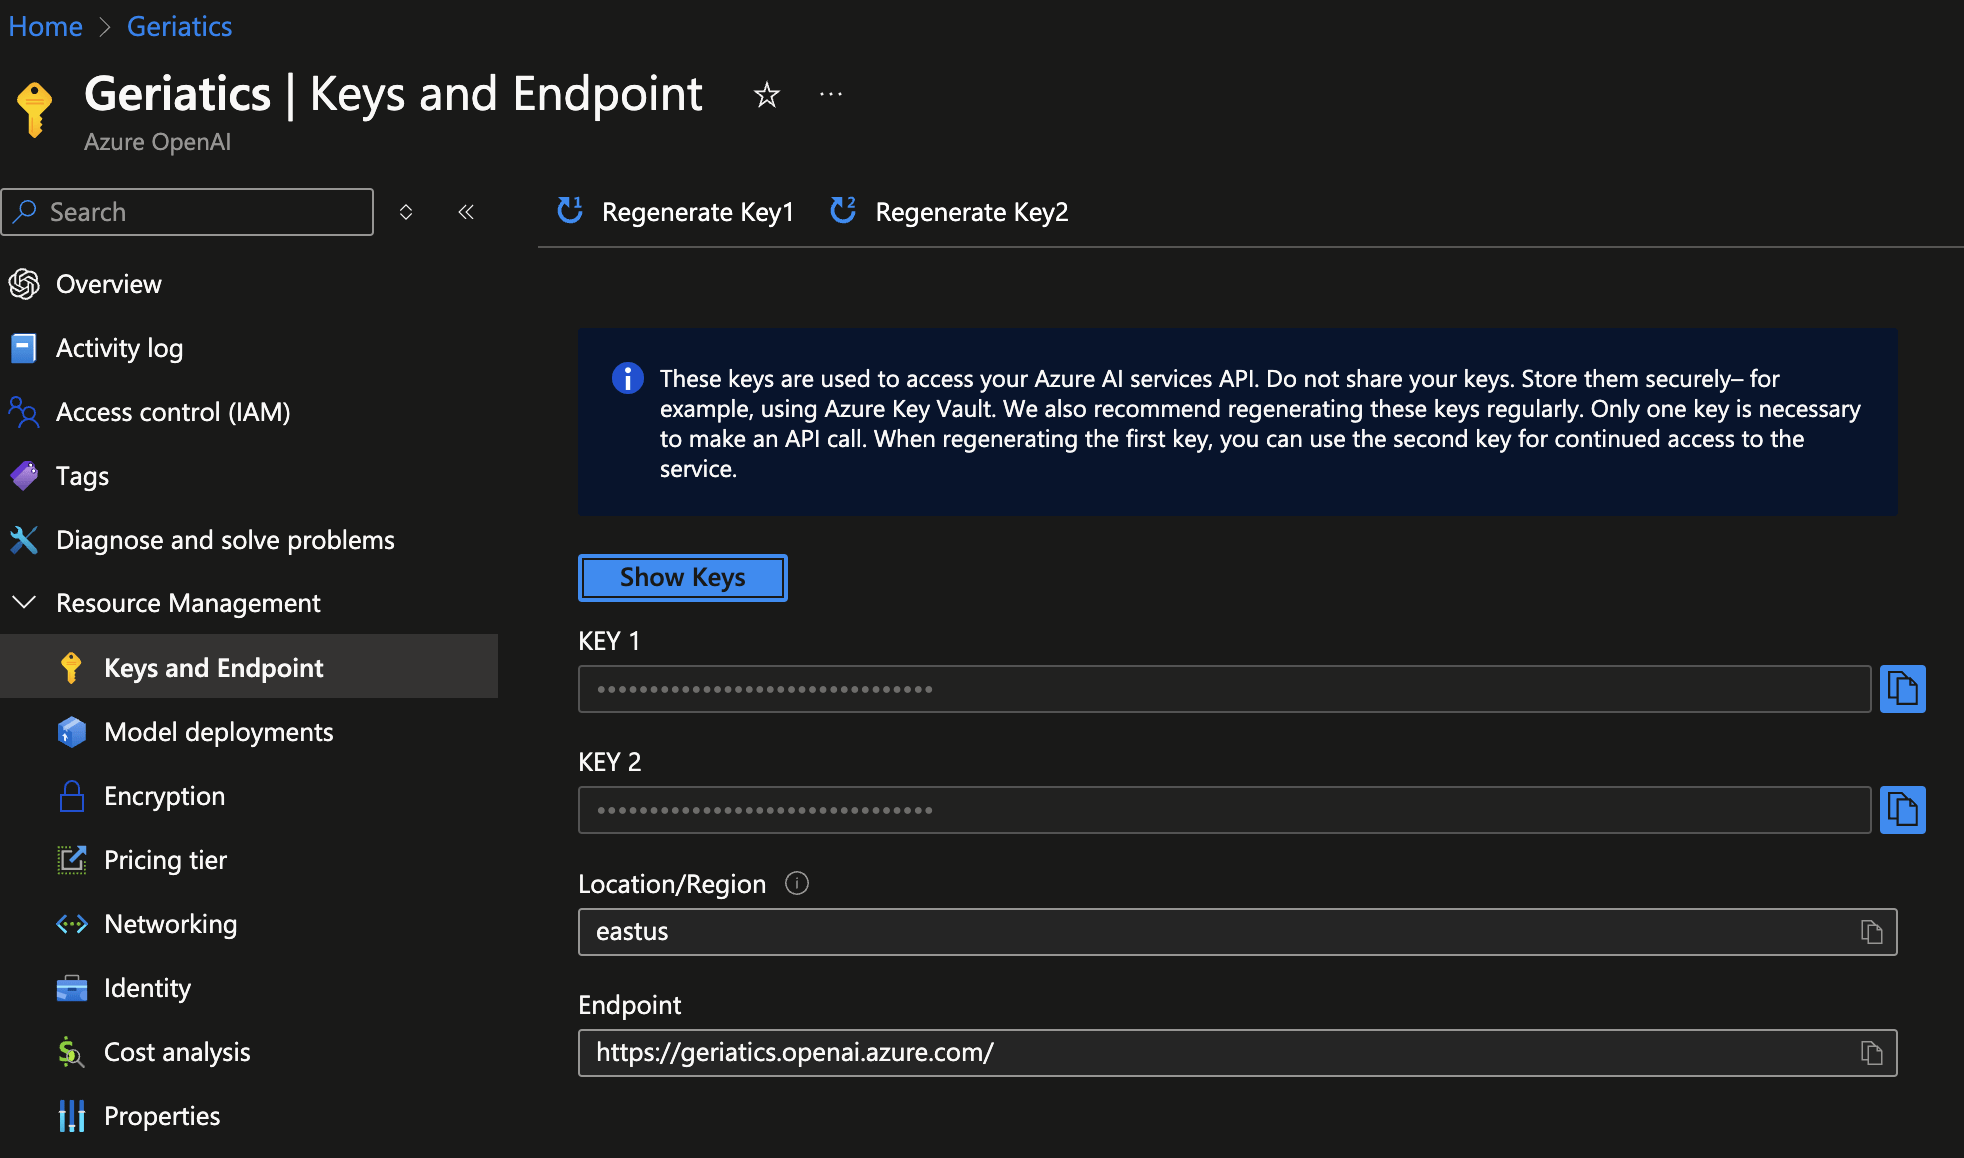
You can access the API keys for a specific OpenAI resource in the Azure dashboard for that resource, under ‘Resource Management’ and ‘Keys and Endpoints.’ Picture below.
Create OpenAI Deployments
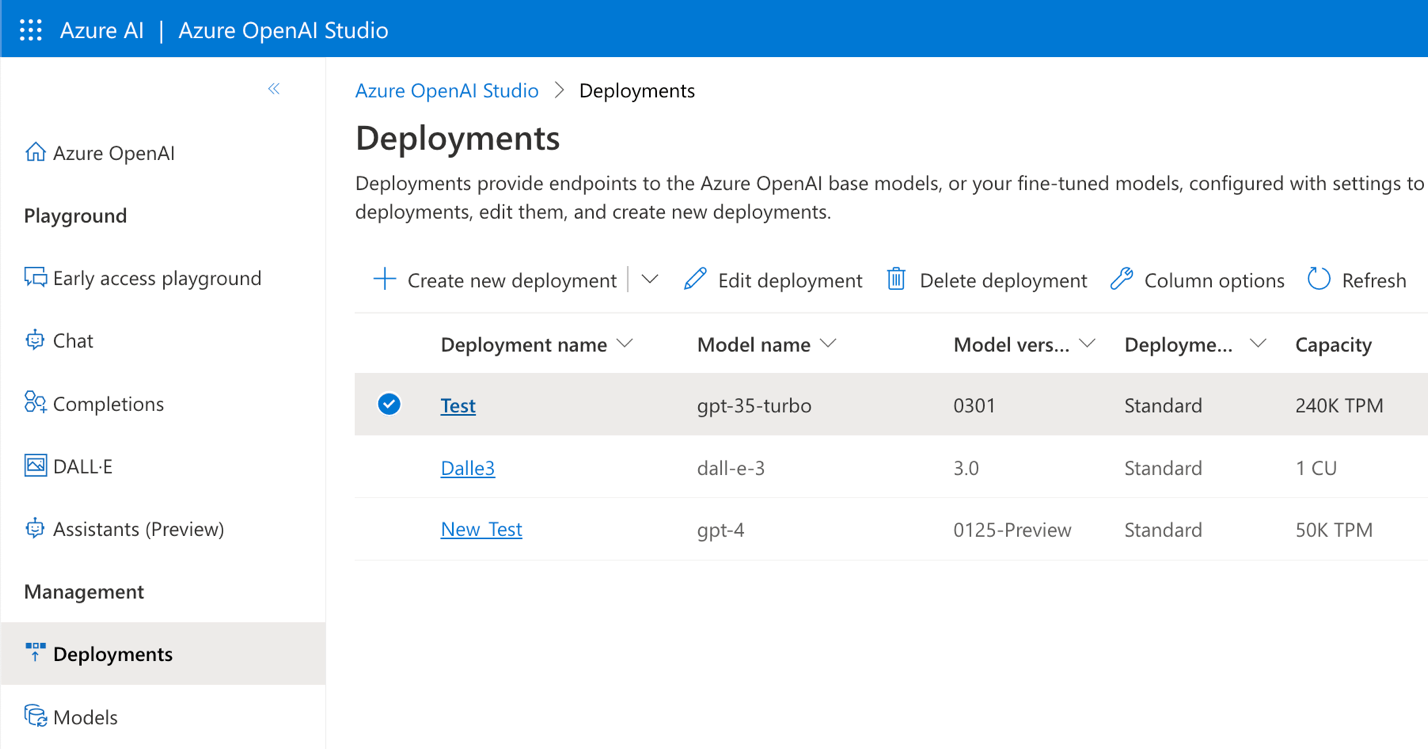
Before the API keys can be used, a deployment must be created. Multiple deployments can be created within an OpenAI resource via Azure OpenAI Studio. Each deployment can be tracked, but still share the same API key. Within API calls, the deployment is specified. You can also specify usage quotas. These are not cost based but based on ‘tokens per minute.’ Please note that quotas are per entire subscription and per region. If you discover you need additional allotment, please contact us. You can also create OpenAI resources in the East US 2 region to get additional allotment.
Checking Cost Usage
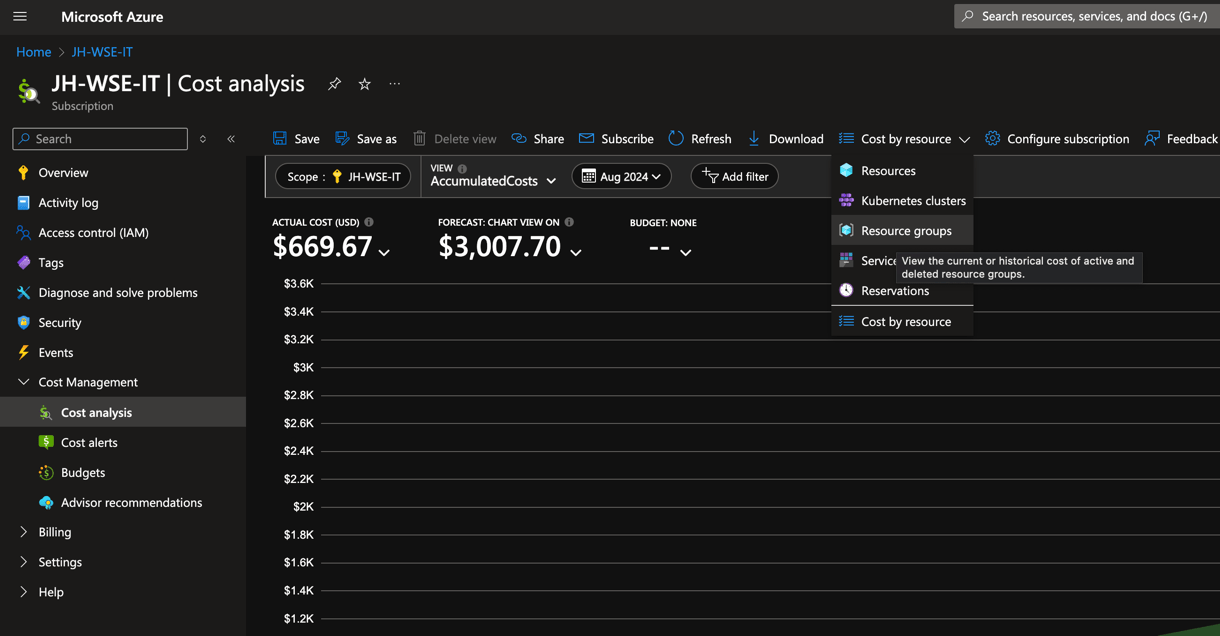
In the Azure portal you can check your usage by searching for ‘subscriptions’, selecting your subscription, and then in ‘Cost Management’ you can check both ‘Budgets’ and ‘Cost Analysis.’ In Cost analysis, a preferred view is by ‘Resource Group’ which can be selected in the ‘cost by resource’ drop down. Picture attached.
Additional Reading
Additional information about Generative AI tools at WSE.
Quickstart: Get started generating text using Azure OpenAI Service
- People not affiliated with WSE: You’re great, but we can’t help you with this. Contact your divisional IT staff and they’ll get you going. ↩︎