- Download Ansys ISO’s from WSEIT’s software site (VPN required if off campus) located at https://software.wse.jhu.edu/
- For Windows O/S, there will be EIGHT ISO files to download:

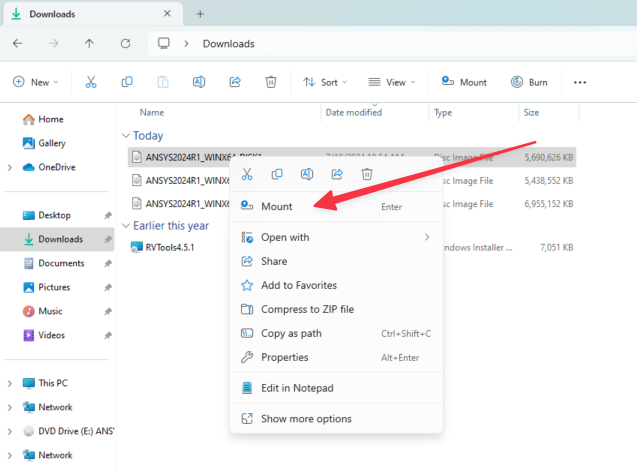
- Once downloaded, you will need to mount the first ISO: ANSYS2025R2_WINX64_DISK1.iso
- To do this, right click on the file and select Mount

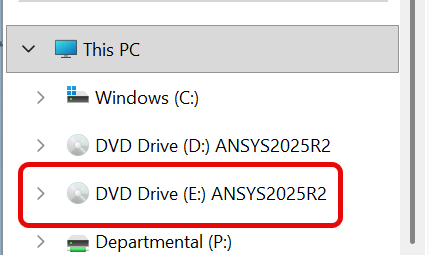
- This will “mount” the ISO/Disk file to a drive on your PC. Most likely D: or E:
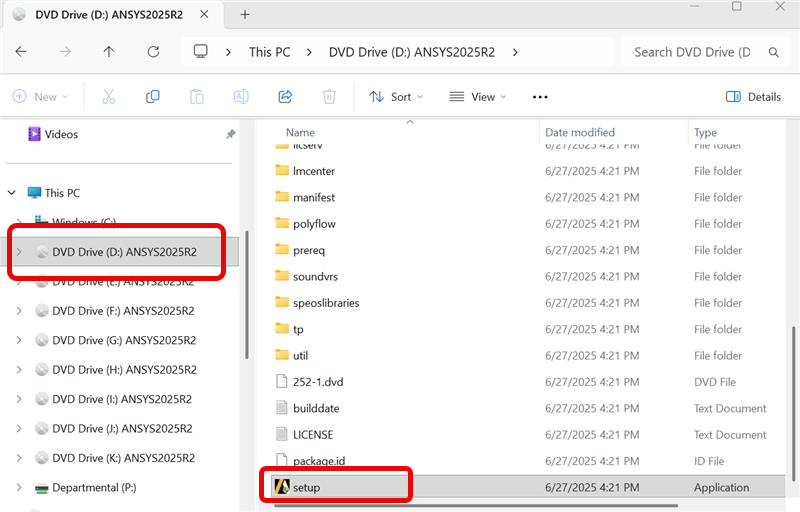
- Click on the newly mounted drive in File Explorer and double click setup.exe

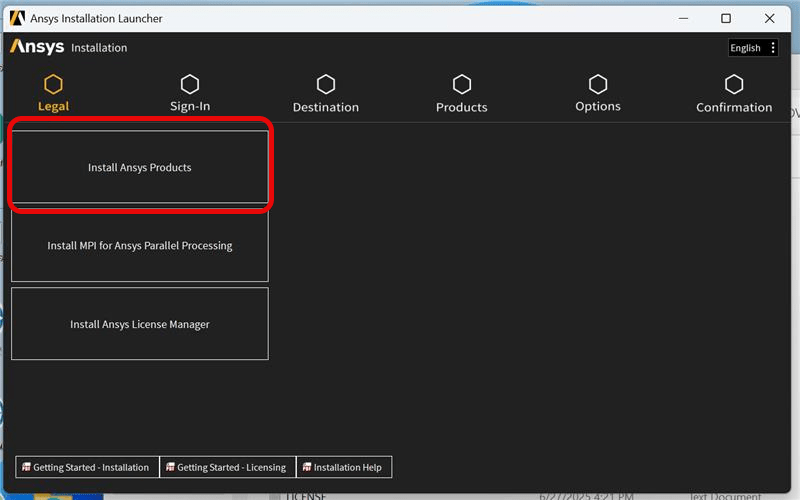
- The installer will now launch. Click “Install Ansys Products”:

- Agree to license terms
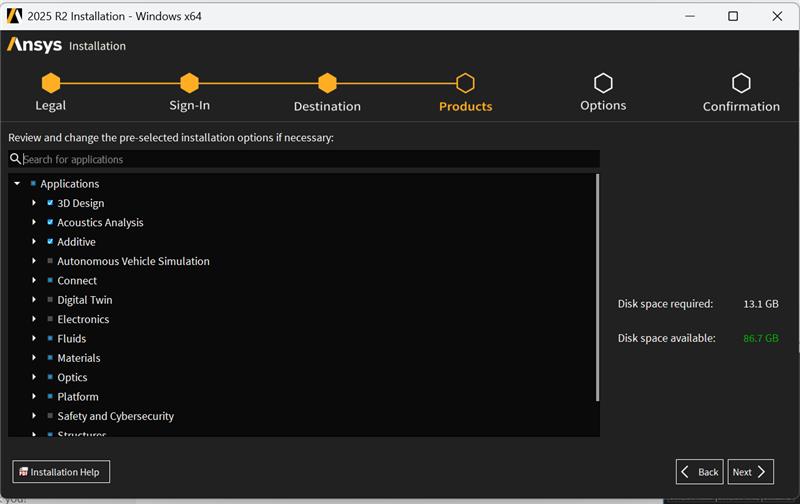
- Click next and leave all defaults until this page:

- Select packages you will need for your course. If you are unsure, you can select everything, installation will be around 5GB.
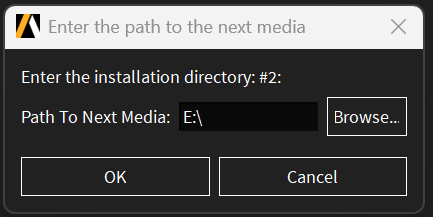
- At some point in the installation, disk 2 will be required. You will need to mount this, just like in Step 4.

- Once mounted, it should show up as a separate disk in File Explorer. For example, the first disk was Drive D: Disk 2 is now mounted as E:

- Return to the installer and point the “Patch to Next Media” to drive E:

- Hit OK and continue the installer
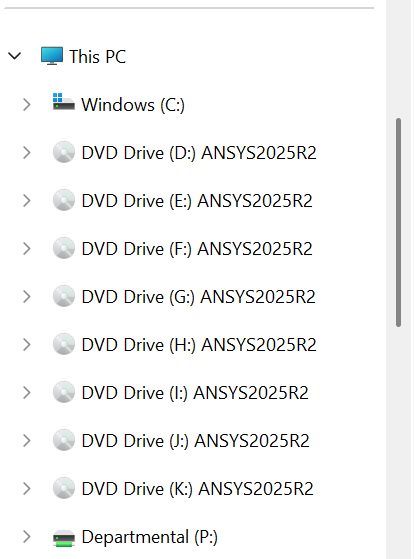
- Repeat process for the rest of the ISO files when asked for disk/directory #3-8:

- Once the installation is completed, you can Right Click on each DVD Drive and select Eject.
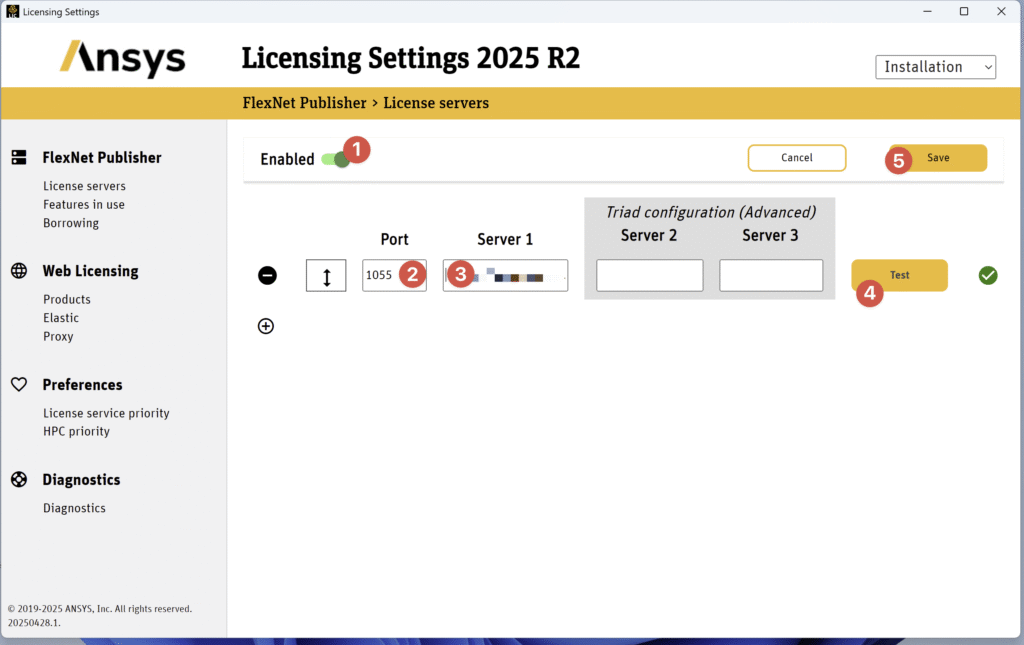
- When first launched, the “Ansys Licensing Client” should automatically launch. Toggle “Enabled” to turn on the licensing, then enter the port and license server information emailed to you during download and click “Save”. You can use the Test button to make sure you entered the information correctly. If you misplaced the email with the license server information, you can return to the software site and have the email re-sent to you.
- Remember: Port is a number, and server is the name of a server on the internet. This is specified in the email you receive when downloading the software. The “Triad configuration” section should be left blank.


REMINDER – You need to run the JHU VPN (available on MyJH) when using the software!!